Google Tag Manager (GTM) is a powerful tool for marketers and developers that will take your reporting to the next level.
Google Analytics offers a ton of options for tracking your website’s performance. Adding basic page tracking is fairly simple, even for a non-technical person. Going beyond that and getting into the granular data of how a user actually interacts with a page can require much more technical knowledge. The good news is that Google knows not everyone that will be managing analytics will have such a deep knowledge. Google Tag Manager (GTM) was made just for such a situation.
Google Tag Manager Uses
While event tracking can be done without GTM, GTM is a very convenient way to set it up and has tools to build most events without using code. With the basic page level tracking you only get data based on pageviews. However, it doesn’t include information about what the visitor actually did on the page. Event tracking allows you to essentially track any interaction a user has with the page. This type of tracking is necessary on dynamic pages where multiple actions can be taken without ever changing URL.
Creating Events
To use event tracking, variables, triggers, and tags are created in GTM.
Variables
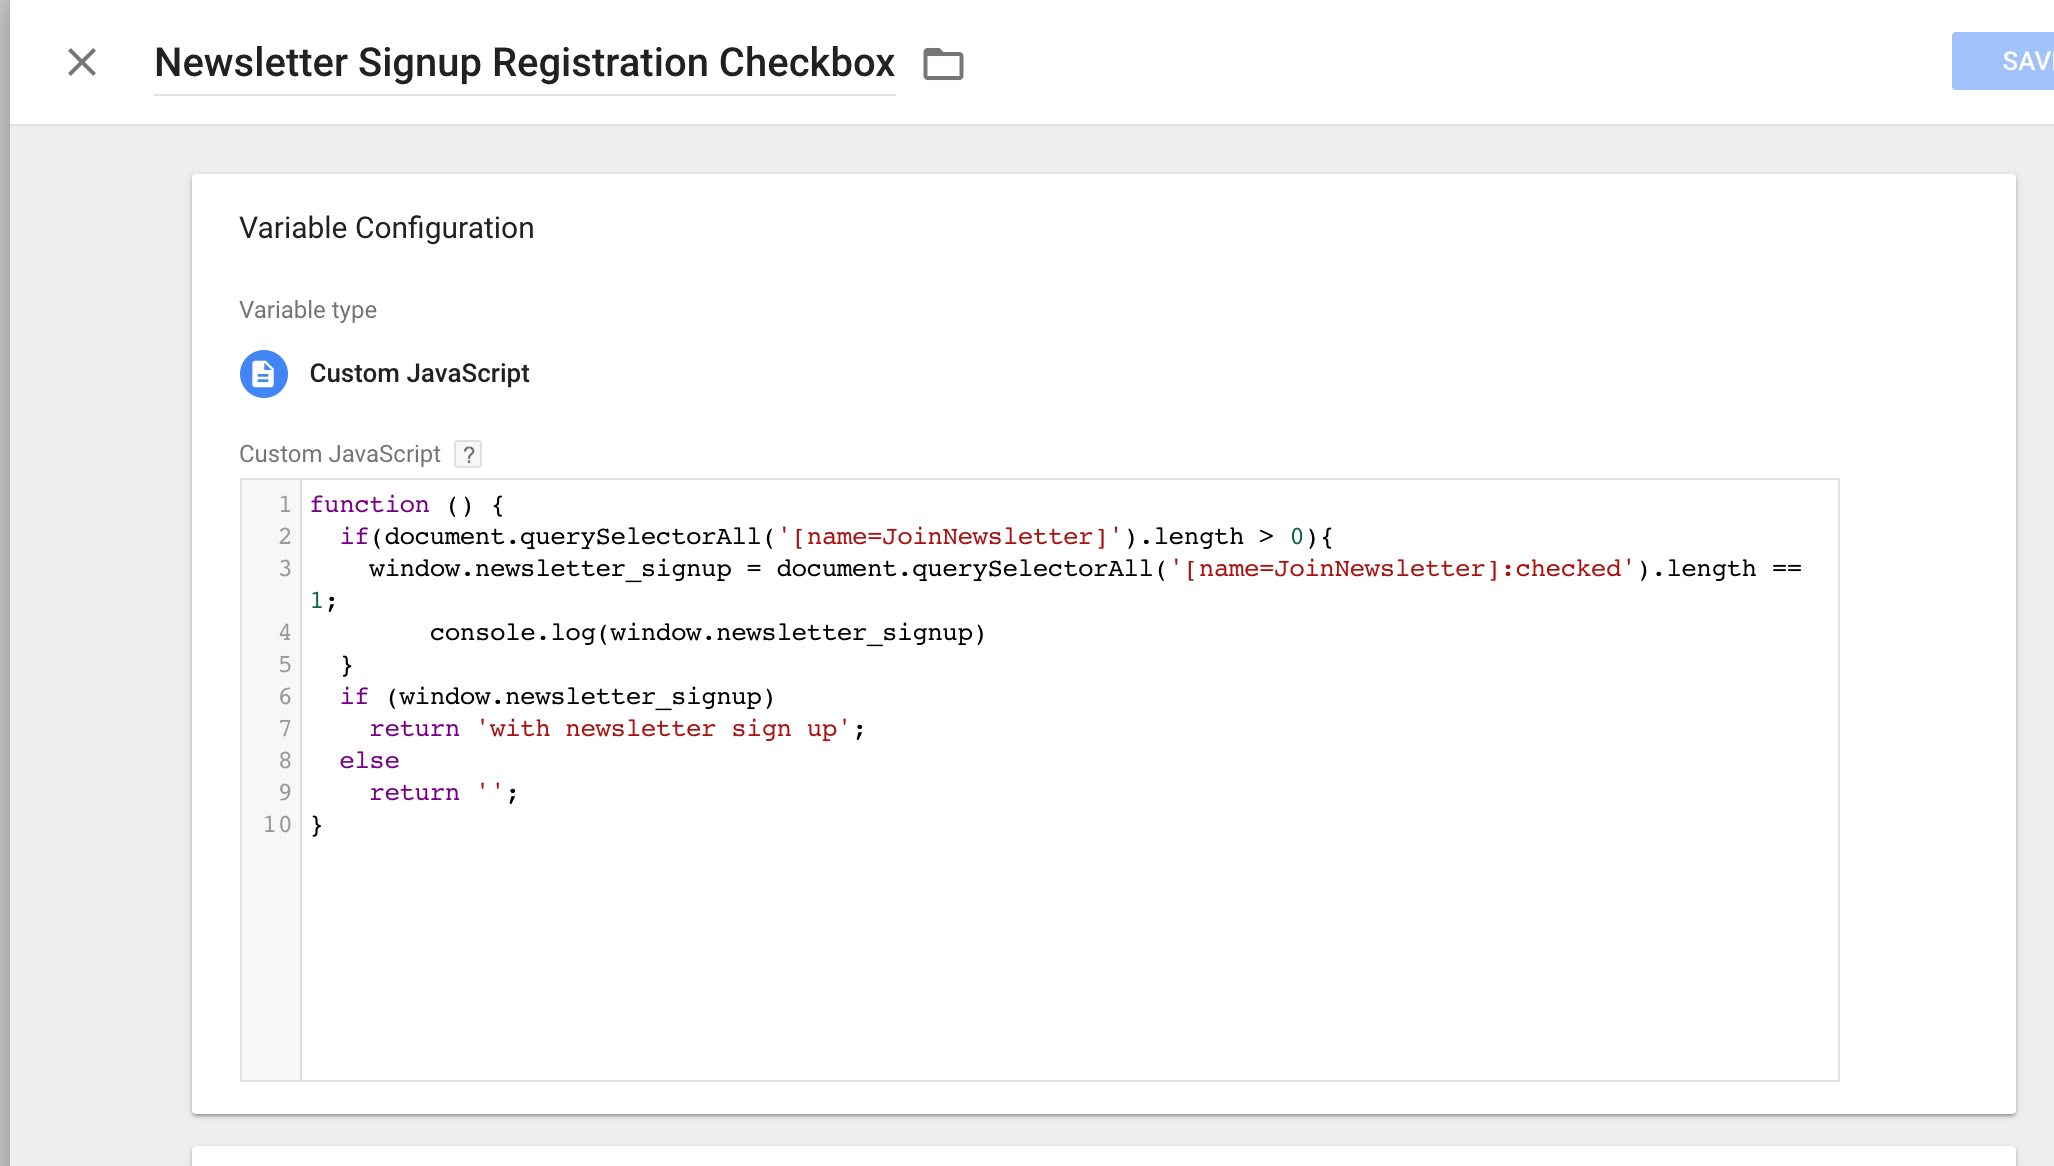
Variables allow you define a custom bit of text, number, or code.
Event Triggers
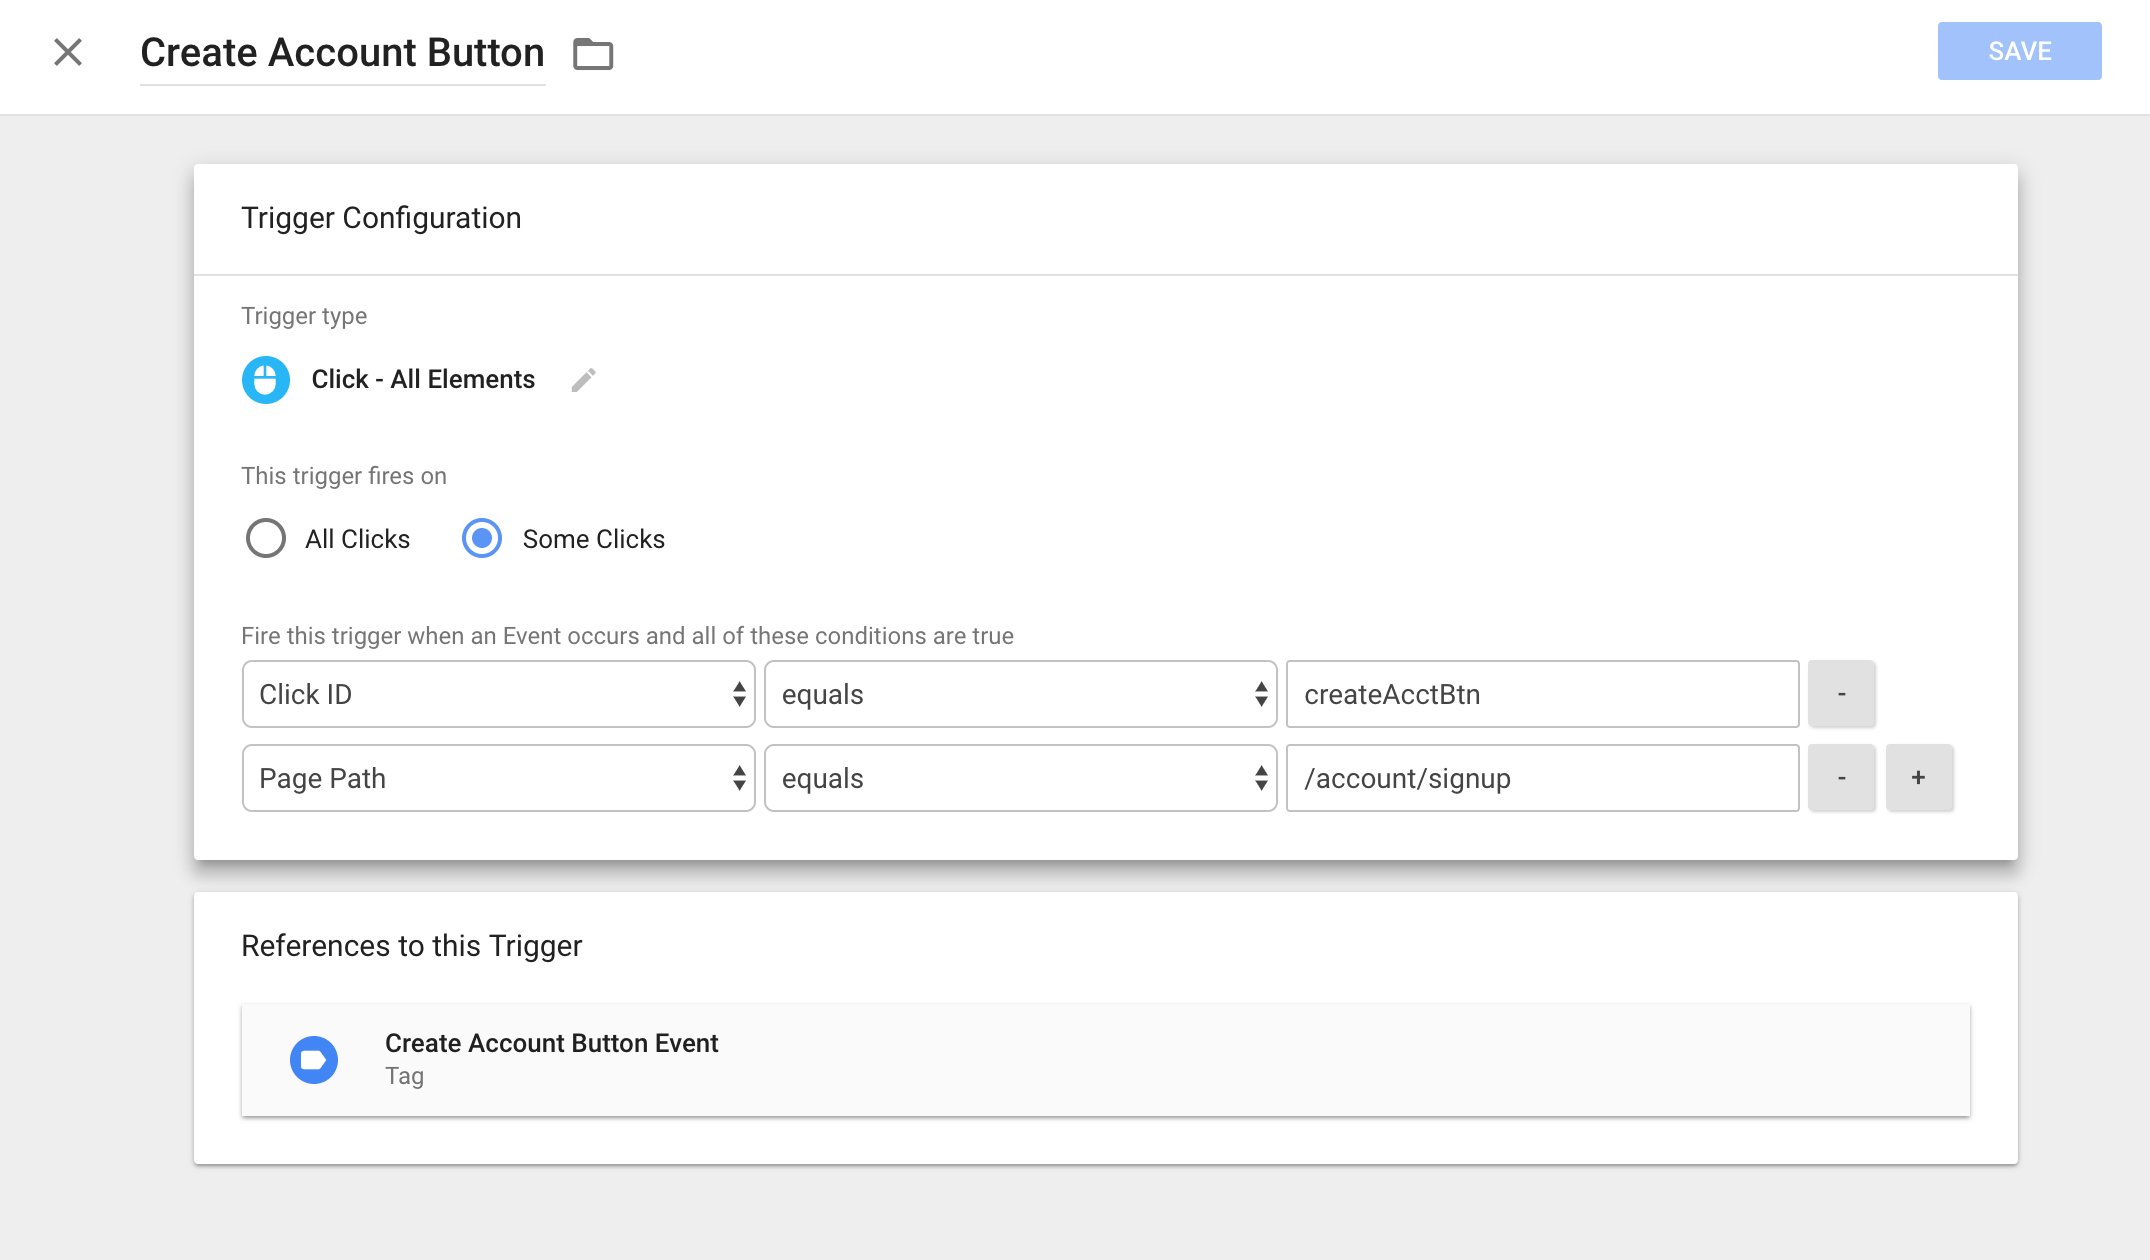
Triggers define things that happen on the site that we care about, for example when a visitor clicks on a button with certain text or appearance
Tags
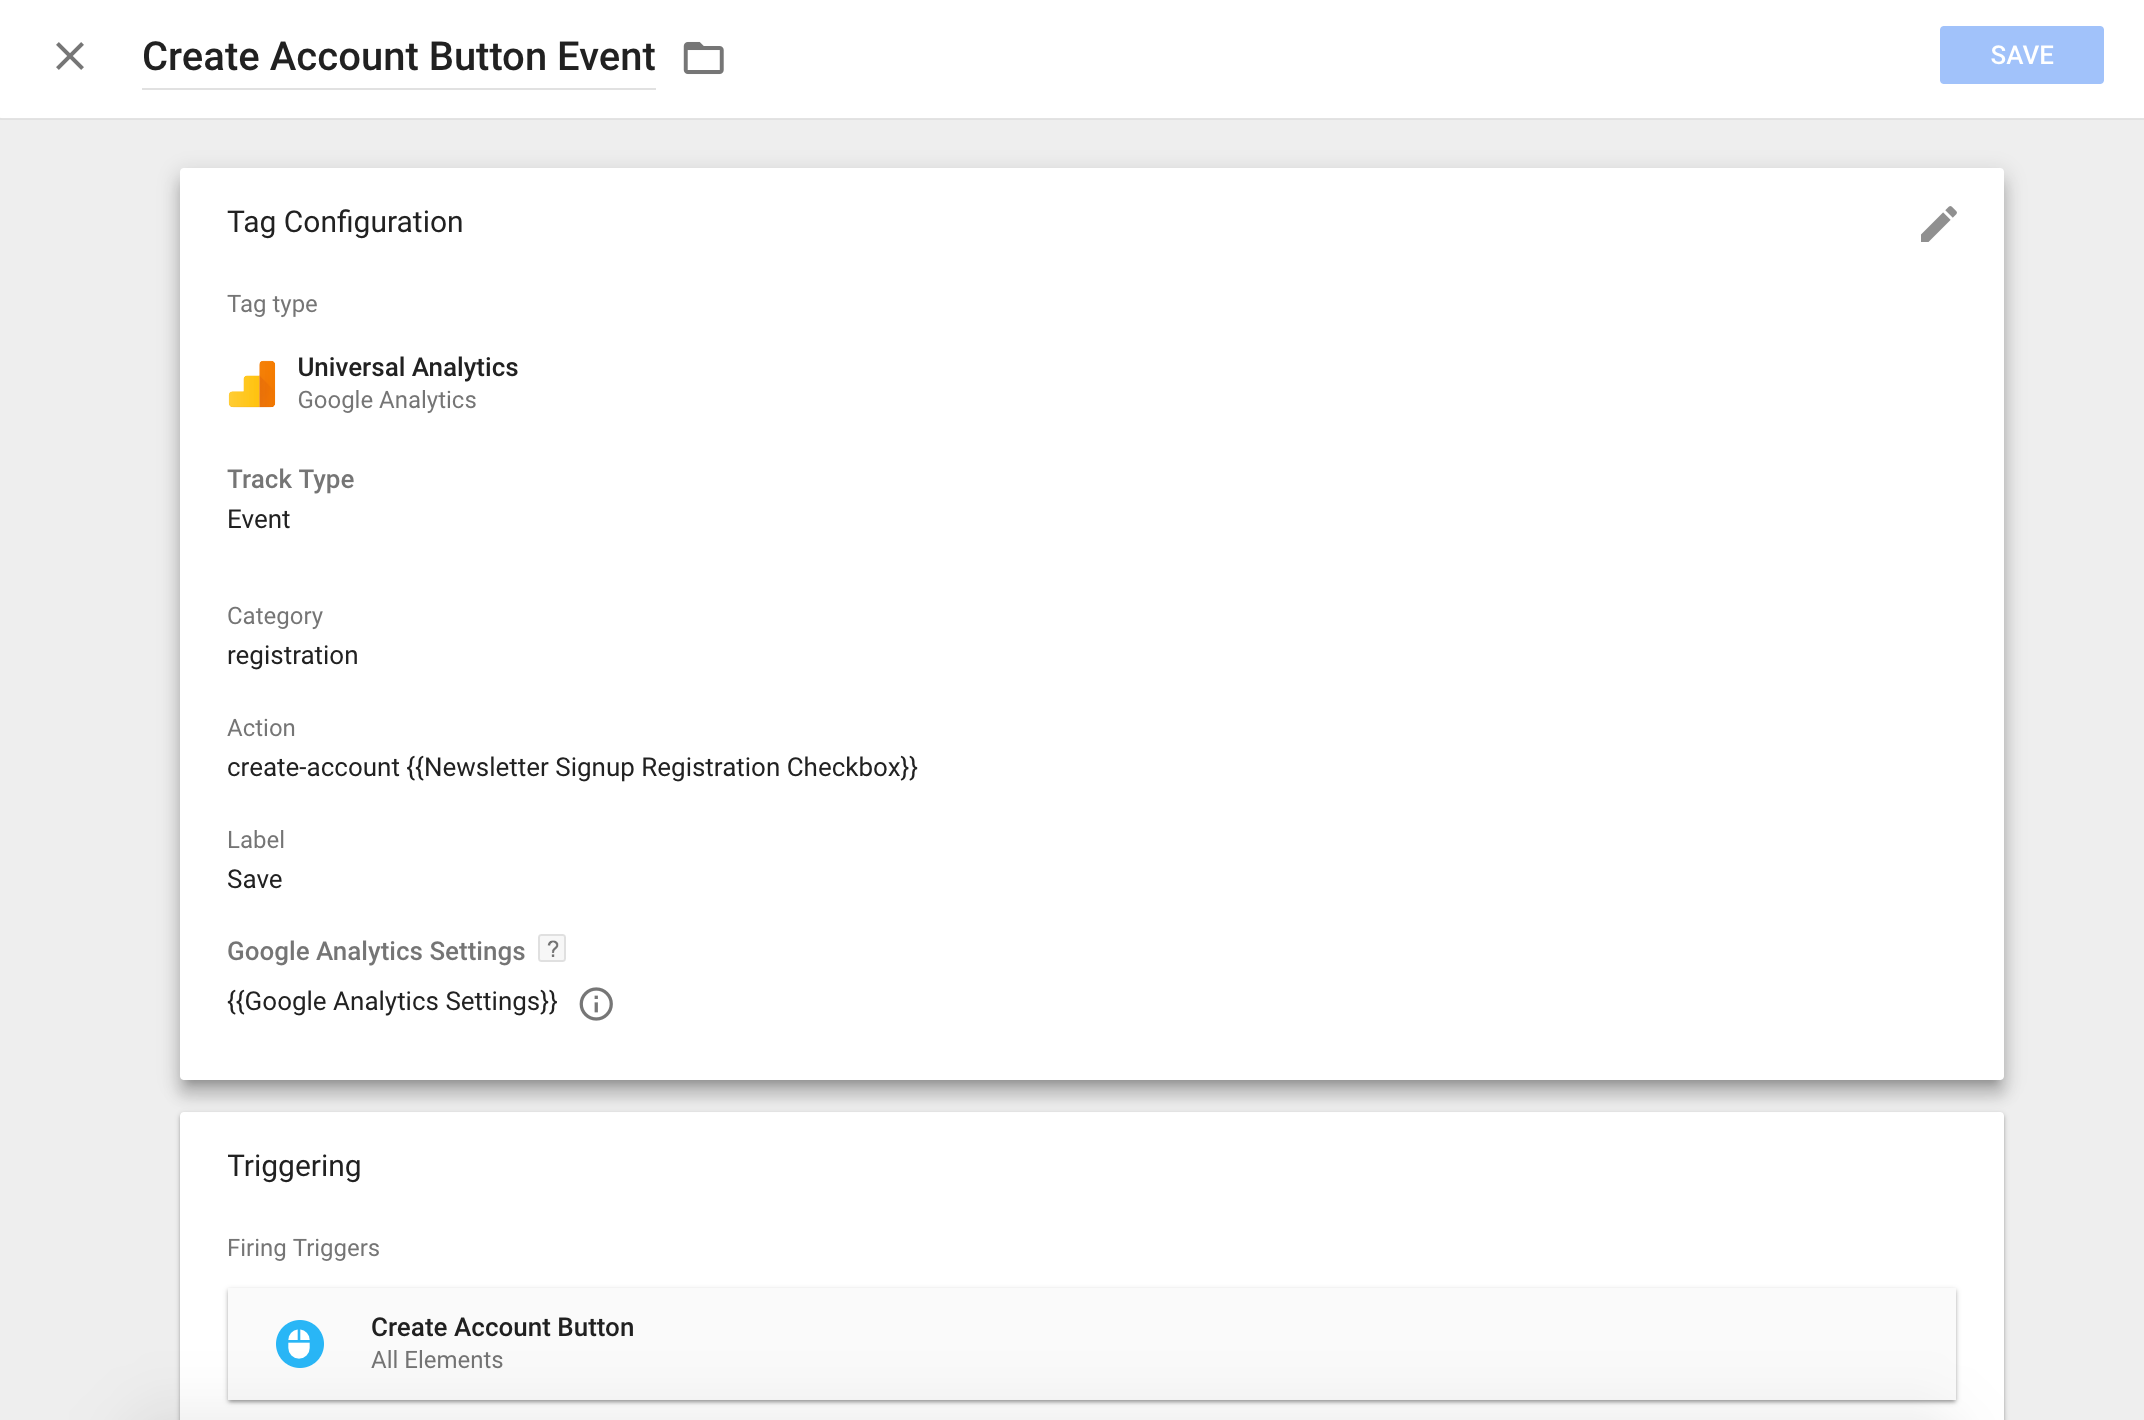
Tags allow you to fire an “event” when one of the triggers is called. A Tag contains 3 attributes:
Category: a type of event or section on the website
Label: the name of the event that is happening
Action: a more user-friendly name (often the text on a button or link that we are tracking)
Example of GTM Events
Imagine we have a video service and want to track the flow of the sign up process. On the account sign up page we could track the buttons/links as events with the category ‘registration’. Here are some other things we could track, along with their event ‘actions’:
- The choose plan buttons ‘choose-plan-premium’ or ‘choose-plan-free’
- The account creation and cancel buttons ‘create-account’ and ‘cancel-registration
- This can be appended with ‘with newsletter signup’ when the newsletter checkbox is enabled.
- Email confirmation notice next button ’email-confirmation-next’
- Submit or cancel payment ‘submit-payment’, ‘cancel-payment’
With these events, we can track all of the registration steps inside the page. Although a few could be tracked with basic analytics, making them events will help our reporting down the road.
- Tracking on the 3 welcome page sign up buttons ‘welcome-page-header-sign-up’, ‘welcome-page-main-sign-up’, ‘welcome-page-lower-sign-up’
- Tracking the header sign up link ‘header-sign-up’
- Where to they go after signing up: watch a show ‘watch-show’ or edit profile ‘customize profile’

Analyzing the Data
With all of this in place, we can do a few nice things in Google Analytics. We can count registrations and payments based on a date range. Or we could compare events such as the user watching shows vs editing profile at the end of the process. Also, the events flow report allows you to see what order events are being triggered in, and at what points users are dropping off. Google Analytics also has the option to set goals and monitor them based on events. (In our example, we could have goals for account signup and payment submission).
Google Tag Manager allows for all of this tracking to be done with very minimal coding. Now the hard part is finding what events you want to track! Training is readily available, so there is really no reason not to incorporate Google Tag Manager into your site today.
GTM Training Resources