Chrome’s rising popularity as the world’s pre-eminent web browser makes it a great time for developers to write Chrome extensions. According to NetMarketShare.com, Chrome makes up over 58% of the desktop browsing market right now. Luckily, Google makes it easy to publish Chrome extensions, plus you get to use technologies that you already know.
Chrome extensions are bundles of HTML, CSS, and Javascript files that add some functionality to Chrome. Some examples are Pocket for keeping track of articles you want to read and Reddit Enhancement Suite which adds infinite scroll and other goodies to Reddit.com. Chrome extensions are also great for businesses that already have an API to leverage, because extensions can serve as another platform for users to find your app and are always visible in the browser toolbar (the Evernote Web Clipper for keeping track of things you see on the web is one example).
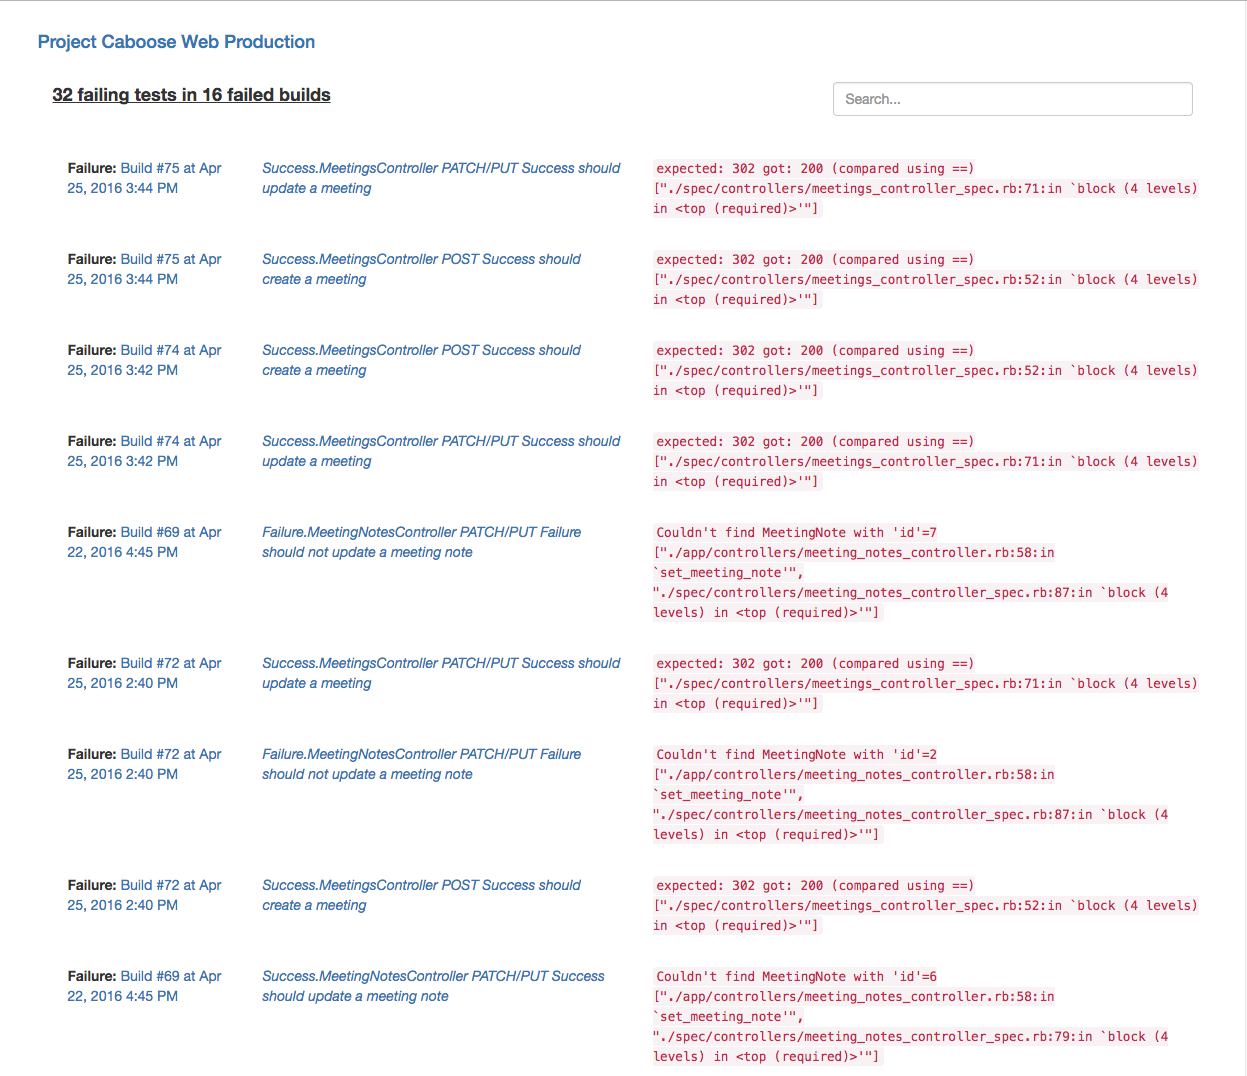
Another example of where you might use a Chrome Extension is to help you automate tasks that you find yourself doing all the time. At Metova, developers use Jenkins, a continuous integration tool that runs a project’s full test suite each time code is committed before deploying an application. If a build fails and your project is configured with Junit, Jenkins will save the names and stack traces of the failed tests. That information is not always easy to access if you’re trying to compare the results of multiple failed builds, so I made an extension called Evil Jenkins to help developers do just that.
Making the Extension
Before starting development of an extension, it’s helpful to do a little planning about how it should behave. For this extension, I want users to be able to visit any project page on Jenkins, click the extension icon, and view the test names and stack traces of recently failed builds. I can do this through a combination of content scripts and background scripts. To ensure that users don’t try to use the extension on non-Jenkins sites, I want the extension to be a page action, so its functionality is only available on certain Jenkins domains. In this blog I won’t be going in depth into the architecture of Chrome extensions, but you can find out more here.
To limit the extension to operate only on certain domains, I start by adding the appropriate permissions to the manifest.json, a metadata file in json format that contains basic info, like the name and description of your extension. The manifest.json also declares what I want my extension to do by declaring which files to use for browser actions, page actions, popups, and content scripts.
{
    “Manifest_version”: 2,    "name": "Evil Jenkins",
     ...
    "permissions": [
        "tabs",
        "activeTab",
        "debugger",
        "storage",
        "declarativeContent"
    ]
}
The declarativeContent permission grants access to event listeners on the DeclarativeContent API so I can detect when a page has changed and disable or enable the extension’s page action depending on the url. Next I update the background.js file to use this event listener.
chrome.runtime.onInstalled.addListener(function() {
  chrome.declarativeContent.onPageChanged.removeRules(undefined, function() {
    var jenkinsRule = {
      conditions: [
        new chrome.declarativeContent.PageStateMatcher({
          pageUrl: {
            hostPrefix: 'jenkins.',
            hostSuffix: '.com',
            schemes: ['https']
          },
          css: ['div[id=buildHistory]']
        })
      ],
      actions: [new chrome.declarativeContent.ShowPageAction()]
    };
    chrome.declarativeContent.onPageChanged.addRules([jenkinsRule]);
  });
});
I then want to inject some javascript into the page of the active tab if it is a valid url. First I go back to the manifest.json file and add some matchers that will filter urls and declare to Chrome to when it should inject the content script. I can control which pages Chrome will inject my content scripts into by using a combination of matches, include_globs, and exclude_globs patterns. Google’s Match Patterns API is a little constrictive when it comes to matching against subdomains, but it should be enough to get the job done.
{
    "manifest_version": 2,
    "name": "Evil Jenkins",
    ...
    "content_scripts": [{
        "matches": ["https://*.com/view/*/job/*/", "https://*.com/job/*/"],
        "include_globs": ["*https://jenkins.*"],
        "exclude_globs": ["https://*.com/view/*/job/*/*/", "*/HTML_Report/*"],
        "js": ["app/content.js"],
        "run_at": "document_end"
    }]
}
Now that I have the popup enabled or disabled by url, I want to have the extension collect build and test data when the user clicks the icon. The content script that I’ve injected into the active tab’s page can access the dom of that page. However, my background script cannot because it exists in its own context. This is where I can use Message Passing to tie the different parts of the extension together.
I begin by adding a listener on the background.js file that will listen for user clicks on the icon.
chrome.pageAction.onClicked.addListener(function(tab) {
  getFailedBuildInfo(tab)
});
When triggered, that will run the getFailedBuildInfo method in the background script, which will broadcast a message to other pages of the extension. To capture that message, I set up an event listener on the content.js script that will run code that scrapes the page for links to failed builds and return that data to the background script using the sendResponse() callback.
  chrome.runtime.onMessage.addListener(function(request, sender, sendResponse) {
    function findFailures() {
            …
    }
    sendResponse({
      failedBuilds: {
        failures: failedBuilds,
        rootPath: window.location.href,
        projectName: document.getElementsByClassName("job-index-headline page-headline")[0].textContent
      }
    })
  }

  findFailures()
});
Back in the background.js script, I capture those values in a callback and use theStorage API to store the data for the extension to access later.
function getFailedBuildInfo(tab) {
  if (tab) {
      … // broadcasting the message to the content script
    }, function(response) {
      chrome.storage.sync.set({
        failedBuilds: {
          failures: response.failedBuilds.failures,
          rootPath: response.failedBuilds.rootPath,
          projectName: response.failedBuilds.projectName
        }
      }, function() {
          … // some other callback code
    })
  }
}
Now that I have the urls to the failed builds from the active page, I want to search those builds for failed tests and display the results to the user. To do this, I open a new tab in the background script once the data has been received.
    chrome.tabs.create({
       url: chrome.extension.getURL('index.html')
    }, function(tab) {
       console.log('tab opened')
    })
This tells the browser to open up a new tab using the ‘index.html’ file in the extension. The index.html file loads all my Javascript and styling dependencies. To make scraping and displaying the data easy, I’m using AngularJs. In my Angular controller, I add an event listener that will listen for page load events, retrieve the stored build urls, and start the scraping process.
angular.module('evilJenkins').controller('indexCtrl', ['$scope', '$http', function($scope, $http) {

    $scope.$watch('$viewContentLoading', function() {
      chrome.storage.sync.get('failedBuilds', function(keys) {
         … // initializes some scope variables
      if ($scope.failedBuildsCount > 0) {
        $scope.fetchBuildData(keys.failedBuilds)
      } else {
          … // stops the loading icon and shows an empty results page
      }
    })
  });
}])
The fetchBuildData() method asynchronously runs the scraping logic, retrieving any failed tests and utilizes Angular’s data binding to display the test names and stacktraces to the user in a searchable, easy to read format.
Publishing the Extension
Unlike the Apple iTunes store where you have to wait and go through a lengthy review process, Google makes it easy to publish Chrome extensions. All you need to publish on the Chrome Extension Store is $5 and a Gmail account. You literally zip up all of your files, and upload them using the Google Developer Dashboard. The extension will be available for download on the Chrome store within 15 minutes or so.
If you’re using Angular, please note: You won’t be able to package your app on Google Chrome Extensions with default AngularJS implementation, since certain features of AngularJS, like use of inline style, script resources, and the use of eval() to generate code, conflicts with Google’s content security policy. Luckily folks at Angular have developed a hack around this that allows you to deactivate conflicting features through the use of the ngCsp directive.
Conclusion
Chrome extensions are awesome to use and very fun to develop. The functionality that I built out for this extension only scratched the surface of what is possible. In subsequent blogs, I will explore adding features such as user settings, graphing, and API integration.